


Under the Sea Wall Decals
Under the Sea Wall Decals
Premium hand-painted fabric decals that peel, stick, and smooth on in minutes — the easiest way to create a room makeover that the kids will LOVE!
Decal Installation Guide
As of March 1, 2024: We've improved our products to better meet your decorating needs. Our decals are now compatible with both Wash and Wear and Teflon paints, eliminating the need for wall prep with primers.
Before You Start: Prepare Your Walls
IMPORTANT: Do not apply wall decals to freshly painted walls. Allow at least 4 weeks for the paint to fully cure and "outgas" before installation. Avoid applying to walls with old, flaky, or improperly applied paint, as this may affect adhesion and durability.
Please note: While our products are designed to be removable, there is a risk of paint damage upon removal, especially if the wall surface is not in ideal condition.
-
Prepare your walls:
- Wash your hands thoroughly.
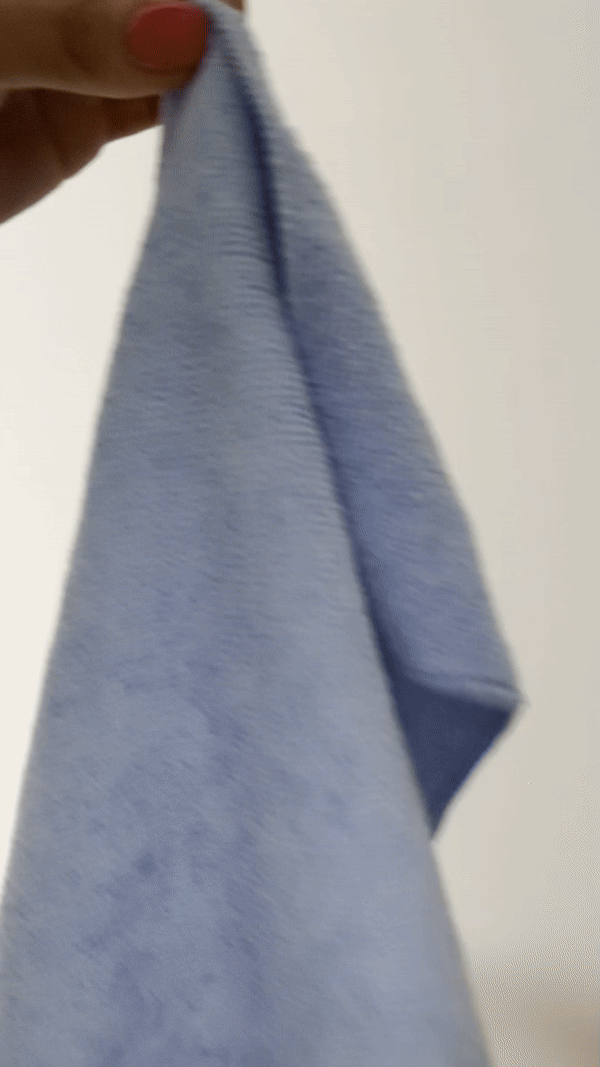
- Wipe down the wall with a damp microfiber cloth to remove dust and debris.
- Ensure the wall is completely dry before starting.
-
Unroll and apply:
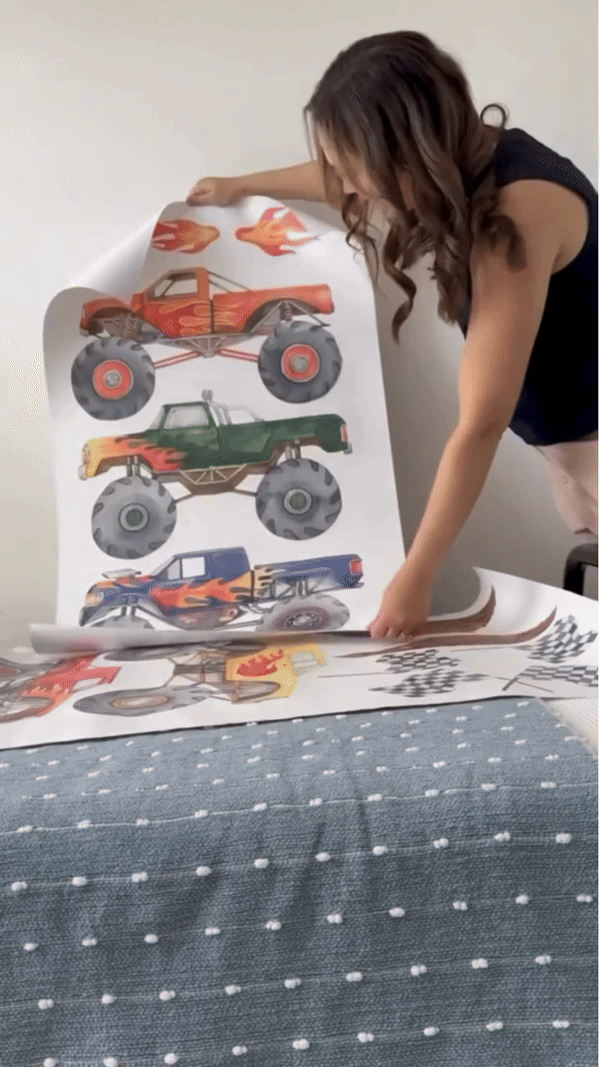
- Remove your decals from the box and gently roll them flat.
- Peel away the decal from the backing.
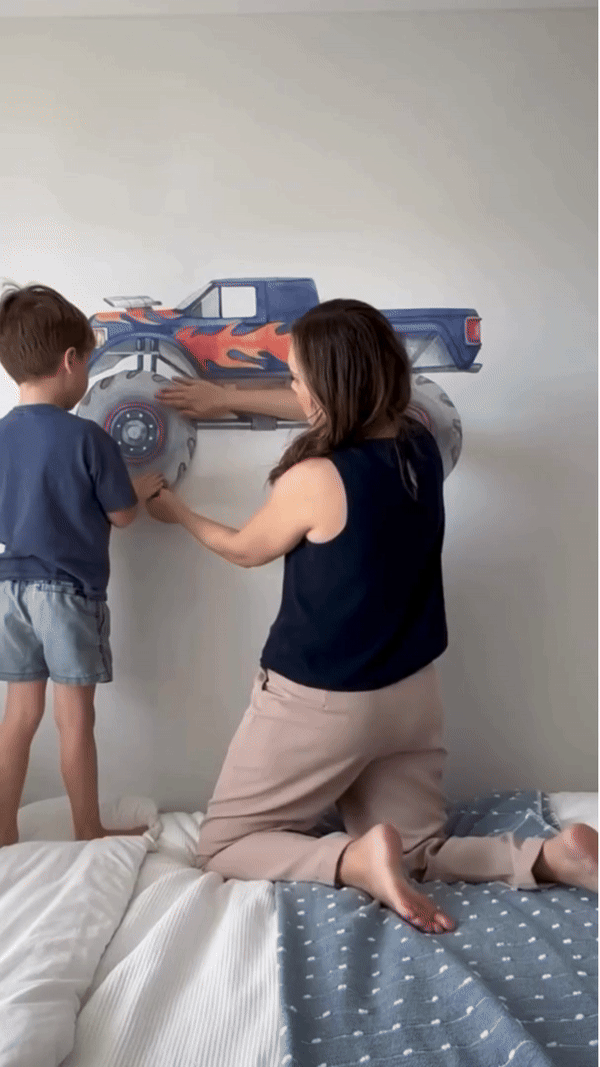
- Place the decal in your desired location.
- Smooth it down gently with your hands.
- Use a felt-tipped squeegee or microfiber cloth-wrapped credit card to remove air pockets.
- Apply firm, even pressure — the adhesive is pressure-activated.
-
For larger decals:
- Overlap each piece by approximately 1 cm.
- Carefully align the pattern from top to bottom.
- Take your time to ensure a seamless look.
-
Re-stick as needed:
- Remove and re-stick the decal until you're happy with the placement.
-
Decal features:
- Opaque design — suitable for colored walls and layering.
- Clean hands and walls before repositioning to maintain adhesive strength.
-
Storage:
- Keep the backing paper to roll up decals for future use or transport.
Safe Use Guidelines: Ensure decals are securely applied. Regularly check decals placed near beds or children’s areas to ensure they remain firmly attached and out of easy reach.
Wallpaper Installation Guide
Before You Start: Prepare Your Walls
IMPORTANT: Do not apply wallpaper to freshly painted walls. Allow at least 4 weeks for the paint to fully cure and "outgas". Avoid applying to walls with old, flaky, or improperly applied paint.
Please note: While our wallpaper is designed to be removable, there is a risk of paint damage upon removal if the wall surface is not ideal.
If unsure, we recommend using an experienced installer who is familiar with self-adhesive wallpaper.
Roll out your wallpaper and check for missing panels or print faults before beginning.
-
Clean the walls:
- Ensure the surface is clean, dry, and dust-free.
- Remove residue, hooks, tacks, blue tack, and switch plates.
- Wipe skirting boards and ensure clean hands with no sharp jewellery.
-
Unroll the panels:
- Start with panel #1 on the left.
- Lay panel design-side down and peel back the top 20 cm.
- Fold the backing paper under to keep it out of the way.
Installation
-
Hang the first panel:
- Use a laser level and mark a straight line.
- Leave a 5 cm overhang at the top and side.
- Let the panel fall naturally — realign if needed.
- Note: Even a 1–2° tilt at the top will throw the whole pattern off. This is not a product fault.
-
Smooth the wallpaper:
- Use a felt squeegee or cloth-wrapped card from top to bottom.
- Peel backing in 30 cm sections as you go.
- Apply even pressure to activate the adhesive.
Dealing with Bubbles
- Large bubbles: Gently peel back to release air.
- Stubborn bubbles: Prick with a pin and smooth down.
Matching & Remaining Panels
- Repeat the steps for all panels.
- Panels overlap by 2 cm — match the pattern carefully.
- Painter’s tape can help align before sticking.
Trimming
- Trim excess: Use a sharp knife to trim edges and around switches.
Special Areas
-
Windows & wardrobes:
- Measure and trim, leaving a 1 cm overlap.
-
Switch covers:
- Remove the cover, cut an "X", fold back flaps, and reattach.
Repositioning
- Clean hands and walls before moving wallpaper.
- Attach the panel to its backing paper using painter’s tape.
- Peel off the wall and line it up on the backing sheet.
- Roll it up and protect edges with bubble wrap.
Safe Use Guidelines: Regularly check wallpaper near beds or children’s areas to ensure secure placement.
Troubleshooting Tips
- Bubbles: Smooth out or pop with a pin. Peel and reapply if needed.
- Pattern alignment: Use painter’s tape to test alignment before applying.
Disclaimer
Our wallpaper is made from premium, peel-and-stick material and is designed to be removable and renter-friendly. However, we cannot guarantee that it will not cause paint damage upon removal, as wall surfaces, paint types, and conditions vary widely between homes. We provide the product only – installation is your responsibility.
Correct installation is critical. Issues such as pattern misalignment or bubbling are almost always the result of incorrect wall preparation or improper alignment—particularly if the first panel is not installed straight. These are not considered product faults.
By purchasing and using our wallpaper, you accept full responsibility for the installation process and any outcomes, including the risk of paint damage. If you are unsure or inexperienced, we strongly recommend hiring a professional installer who is familiar with self-adhesive wallpaper and overlapping panel alignment.
Secure checkout. Ships fast from Melbourne!
from Australia
5-Star Reviews
Guarantee
About this design
About this design
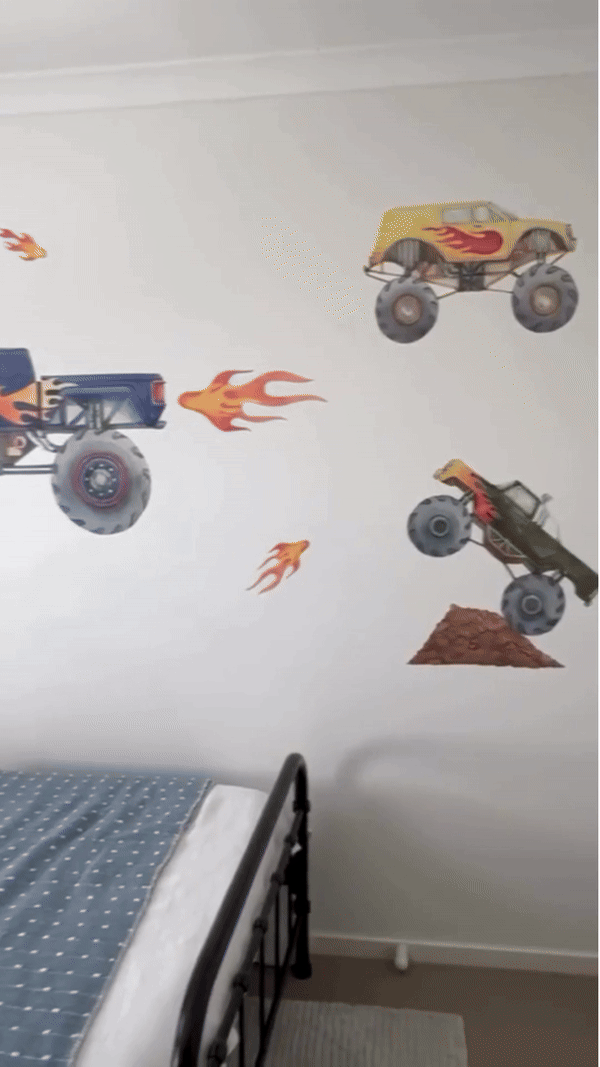
Transform your space into an underwater oasis with our Under the Sea wall decals! Dive into the underwater world with our Under the Sea Fabric Wall Decals! These vibrant watercolour decals feature a variety of ocean creatures, including a graceful stingray, a playful octopus, a friendly turtle, and a clever crab.
The set also includes two adorable seahorses and three playful fish, as well as four pieces of seagrass to create a realistic underwater scene. Create a unique and eye-catching feature wall or bring a touch of the ocean to any dull corner.
These decals are a great way to add some fun and creativity to your space without breaking the bank. So dive in and start exploring the magic of the sea with our Under the Sea wall decals!
Why you'll love it
Why you'll love it
- Removable & reusable adhesive – perfect for renters
- Printed on premium polyester fabric (not cheap vinyl)
- Non-toxic, water-based adhesive – safe for kids & walls
- Easy to apply in minutes – no mess, no glue
- Leaves no residue when removed properly - follow our removal guide
Decal FAQs
Decal FAQs
What makes Tiny Walls decals different?
Every design starts as a hand-painted artwork, created to feel lifelike and calming in your space. We use premium, non-toxic fabric (not vinyl), which gives a soft, painted-on look without the mess. Many of our designs are also intentionally educational — introducing little ones to Australian wildlife, nature, and more through beautiful visual storytelling. Plus, they're blockout material, so they show up perfectly even on coloured walls.
Are they safe for kids and pets?
Yes. Our decals use a water-based, non-toxic adhesive that’s safe for curious kids and furry friends.
Can I use them in a rental home?
Definitely. Tiny Walls decals are designed to be renter-friendly. They go on easily, can be repositioned, and remove cleanly without leaving sticky residue behind.
What does rental-friendly actually mean?
It means the decals are removable and non-permanent. The non-permanent adhesive allows you to gently peel them off, even after they’ve been in place for a long time. For best results, follow the tips in our removal guide.
How do I remove them safely?
Wall condition matters, but here’s how to minimise any risk:
- Use a hairdryer on low heat for 30–60 seconds to warm the adhesive
- Peel slowly from one corner, keeping the decal close to the wall
- Reheat stubborn areas as you go
- Avoid installing or removing decals from freshly painted walls — wait at least four weeks
- Always test a small section first. You can read the full guide here.
How long do they last?
They’re designed to last for years, but when you're ready to refresh the space, they’re easy to remove or swap out.
Will they work on all wall types?
They stick best to smooth, clean walls. If your surface is textured, we recommend testing a small sample before applying a full set.
Still have questions?
We’re always happy to help. Reach out to our team here and we’ll get back to you as soon as we can.
Shipping
Shipping
Fast & Reliable Shipping – Australia & Worldwide
We know you're excited to decorate, so we ship quickly and carefully from our warehouse in Victoria, Australia.
Within Australia
- Decal orders ship within 2-3 business days
- Flat rate shipping: $10 for orders under $200
- Free shipping on orders over $200 (AU only)
- Delivered straight to your door – no long waits, no hassle
International Shipping
- Flat rate: $30 per order
- Standard delivery times:
- USA & Canada: 5–9 business days
- UK: 4–7 business days
Customs, Tariffs & Taxes
All orders ship from Australia. Please note:
- Tiny Walls is not responsible for any customs duties, tariffs, or import taxes applied to international orders
- These charges are determined by your local customs agency and are the responsibility of the recipient
We're here to help you transform your space — and we’ll make sure your decals get to you, fast.
How to Apply your Tiny Walls Decals
1. Clean your walls
Grab a damp cloth and give the wall a quick clean. Dust-free walls mean better sticking power.
2. Peel & Stick
Gently peel the decal and start from one edge. Stick it down, smooth as you go—this is DIY anyone can do, even during nap time!
3. Remove & Reapply
Made a mistake? No stress! Our decals are easy to reposition. Tweak it until you love the look. Kids might “help” too!
4. Step Back & Wow
You did it! Take a step back, soak in the transformation, and get ready for your kids to say, “Best room ever!” ✨

Create the Room They’ll Love (In Minutes)
Our wall decals are the easiest way to give your child’s room a little magic—no paint, no mess, and no hours lost on a DIY project. Just peel, stick, and you’re done. Got five minutes while the kids are distracted? That’s all you need.
When it’s time for a refresh, a quick blast of warm air (like a hairdryer) makes them easy to remove and swap out. No stress, no fuss—just a simple way to keep up with their changing interests (and your limited time).
Beautiful, hand-painted designs bring instant joy to any space. Because decorating should feel fun—not like another task on your to-do list.
Over 15,000 happy Aussie families have decorated with us since 2019


